Follow Me On Social Media!

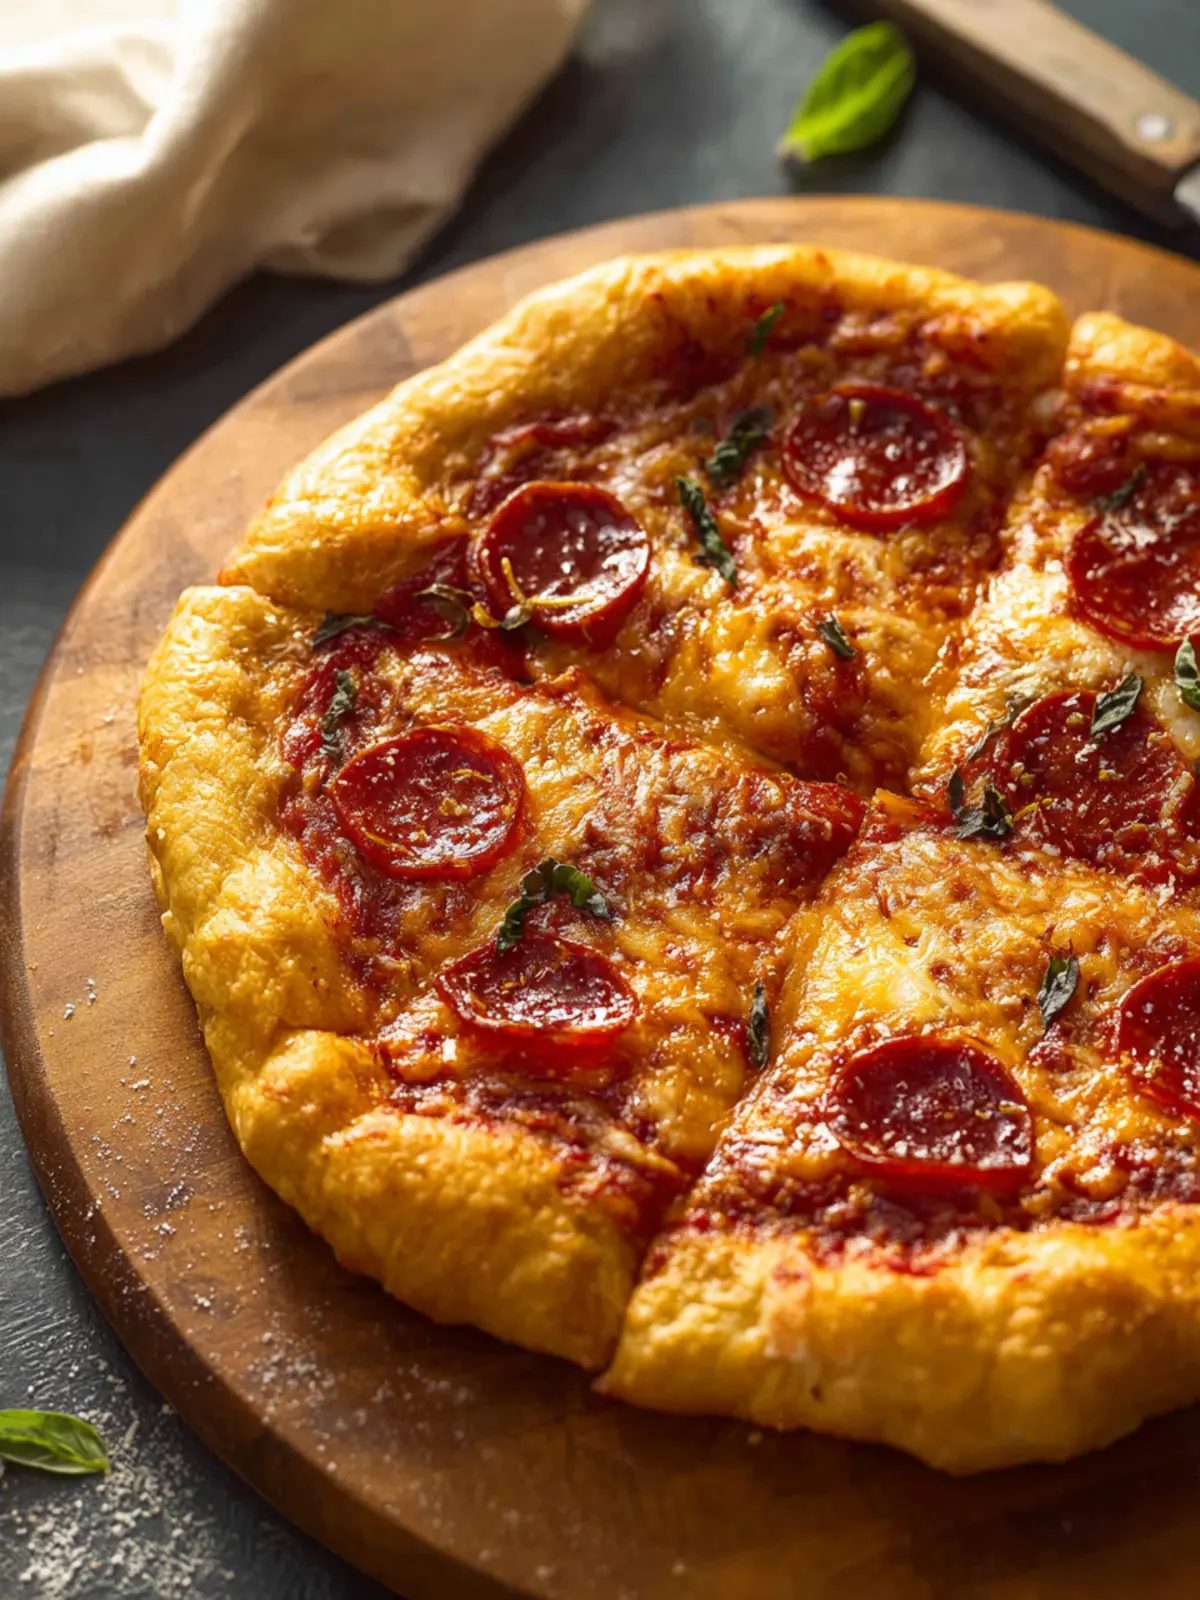
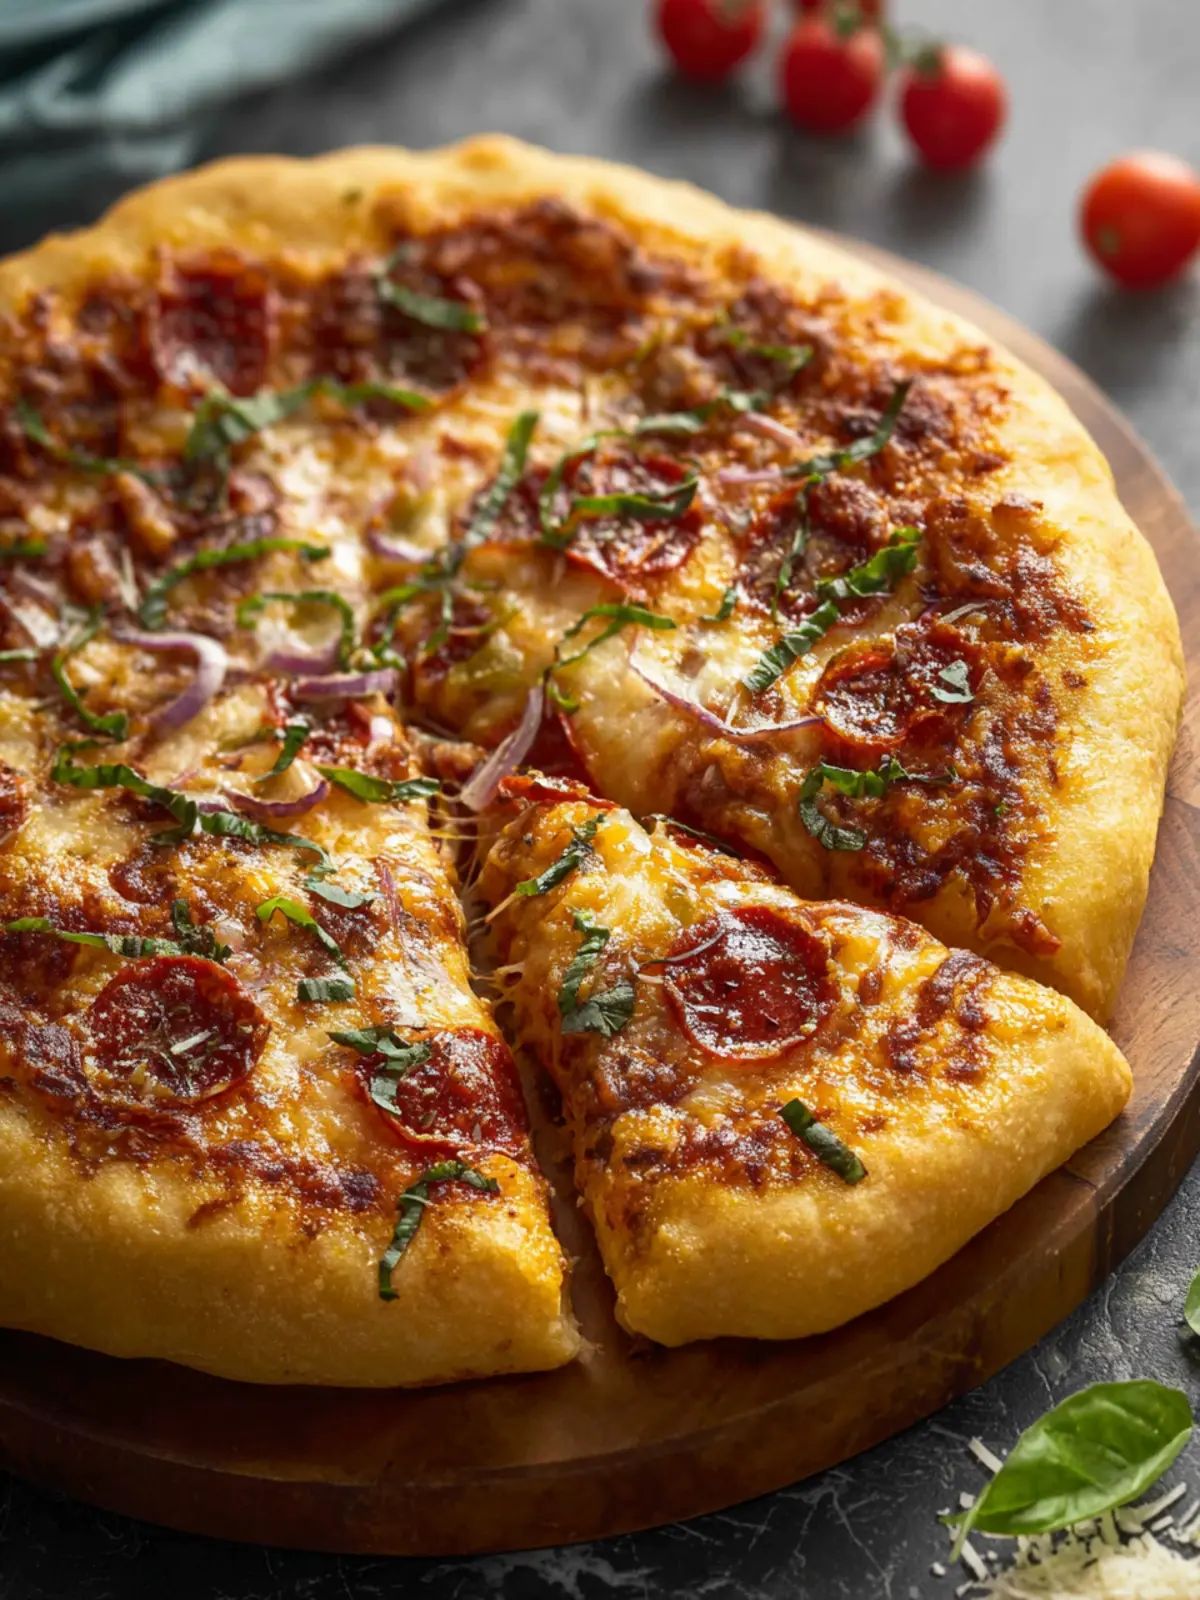
Homemade Gluten Free Pizza Dough: The Best Ever Recipe!
Introduction to Homemade Gluten Free Pizza Dough
There’s something undeniably delightful about the idea of crafting your own homemade gluten free pizza dough. Picture this: a Friday night, friends gathered around, laughter filling the air, and the intoxicating aroma of freshly baked pizza wafting through your kitchen. This scenario isn’t just a dream for gluten-free eaters; it can be your reality. Making pizza dough from scratch might sound daunting, but it is actually a game changer for anyone following a gluten-free lifestyle.
Often, gluten-free pizza options are limited and can be rather uninspiring. You might have experienced the disappointment of a soggy crust or a flavorless base. However, when you create your own homemade gluten free pizza dough, you can customize your pizza to suit your tastes—from the crunchiness of the crust to the vibrant toppings. The satisfaction of kneading the dough yourself, knowing exactly what goes into it, is an experience like no other.
Homemade gluten free pizza dough opens up a world of possibilities for culinary creativity. Do you crave a herby base that sings with flavor? You can add your favorite dried herbs and spices right into the dough! Prefer a chewier crust? Adjust the blend of flours to achieve that perfect texture. The ability to personalize your pizza puts the control back in your hands—something often missing in store-bought options.
Not only is making pizza at home a fun activity, but it can also be a healthier option. You can incorporate wholesome ingredients while avoiding preservatives or additives commonly found in pre-made varieties. Plus, it’s a brilliant way to involve friends and family in the cooking process, turning a meal into a shared experience.
Why not dive into this delicious journey? Making your own homemade gluten free pizza dough may just be the remedy you didn’t realize you needed—delicious, fulfilling, and entirely yours!
Key Ingredients for Homemade Gluten Free Pizza Dough
Creating homemade gluten free pizza dough is not just a cooking task; it’s a delightful experience that brings together a few key ingredients to conjure up a deliciously satisfying meal. Each ingredient plays its unique role in achieving that perfect crust and flavor balance.
-
Gluten-Free Flour Blend: Opt for a high-quality gluten-free flour blend, which typically includes a mix of rice flour, tapioca flour, and potato starch. This combination provides the necessary texture and allows the dough to rise beautifully, mimicking traditional dough.
-
Xanthan Gum: This is the secret weapon in gluten-free baking. It helps bind the ingredients together, giving your pizza dough structure and elasticity that would otherwise be lacking without gluten.
-
Olive Oil: A touch of extra virgin olive oil adds richness and enhances the dough’s flavor. It also contributes to creating a beautiful, crispy crust.
-
Yeast: Active dry yeast is responsible for that delightful rise. It creates air bubbles in the dough, resulting in a light and airy pizza base.
-
Warm Water: Using warm water activates the yeast, helping the dough rise effectively. It’s essential for achieving the right dough consistency.
-
Salt: Just a pinch of salt enhances all flavors, ensuring your dough is deliciously seasoned.
By combining these ingredients thoughtfully, you’re bound to create the homemade gluten-free pizza dough of your dreams!
Why You’ll Love This Homemade Gluten Free Pizza Dough
Flavor and texture that rivals conventional dough
Creating homemade gluten free pizza dough is an experience that defies expectations. You might think gluten-free means sacrificing flavor or texture, but that’s far from the truth! With a combination of gluten-free flours, starches, and a few secret ingredients, you’ll discover a dough that’s not only pliable but also deliciously chewy. The aroma while it bakes is simply intoxicating—think of those classic pizza nights where the crust is the star. You’ll be amazed at how this dough rises to the occasion, giving you that satisfying crunch on the outside and a soft, airy bite on the inside.
Flexibility with toppings
One of the best parts about our homemade gluten free pizza dough is its versatility. Whether you’re in the mood for a classic Margherita, a loaded veggie delight, or a savory BBQ chicken pie, this dough welcomes all toppings. The neutral flavor base allows you to get creative without any limitations. Go wild with fresh veggies, gourmet cheeses, or even unique sauces—whatever your taste buds crave!
Easy prep for busy weeknights
Who says you can’t enjoy homemade pizza on a busy weeknight? With this homemade gluten free pizza dough, prep is a breeze. The ingredients come together quickly, allowing you to whip up a pizza in under an hour. Even if time is tight, this dough helps remove the stress of meal planning, letting you focus more on enjoying your culinary creation with family or friends. Give it a try, and you might find yourself excited for pizza night more often!

Tips for Perfecting Your Homemade Gluten Free Pizza Dough
Creating a delightful homemade gluten free pizza dough not only allows you to enjoy pizza without gluten but also lets you craft a crust that suits your taste perfectly.
Importance of kneading
Kneading isn’t just for gluten-based doughs. For your homemade gluten free pizza dough, proper kneading creates a smooth texture, which helps in achieving that perfect crust. A gentle, thorough knead allows the moisture to distribute evenly, ensuring a consistent rise. Aim for about 5–7 minutes of kneading, and don’t hesitate to sprinkle a bit more flour on your work surface if the dough seems too sticky.
Proofing: Why it’s crucial
Proofing is like a mini-vacation for your dough; it allows it to relax and rise. For gluten-free dough, this step is essential to improve both the texture and flavor. When you let the dough rest covered in a warm place for about 30–60 minutes, the yeast activates and begins to work its magic, giving your pizza a delightful fluffiness that sets it apart from store-bought options.
Customization tips for the dough
Want to take it up a notch? Experiment with different gluten-free flours, like almond or coconut flour, for unique flavors. You can also add herbs, garlic powder, or even nutritional yeast to infuse your homemade gluten free pizza dough with extra flavor. Just remember, adjustments might require tweaks in hydration—so add liquids gradually to maintain the right consistency.
Time Breakdown for Homemade Gluten Free Pizza Dough
Creating homemade gluten free pizza dough can be a delightful experience, especially when you know how to manage your time effectively. Let’s dive into the essential time components that will have you enjoying gourmet pizza right from your kitchen.
Preparation time
Getting started with your homemade gluten free pizza dough takes about 15-20 minutes. During this time, you’ll mix your gluten-free flour with the other ingredients, creating a dough that’s both easy to work with and full of flavor. It’s a fun stage where you can unleash your creativity!
Rising time
Next, allow your dough to rise for 1 hour. This crucial step is what helps develop texture and flavor, giving your pizza a delightful chewiness. Cover it with a cloth and place it in a warm spot, turning it into a cozy environment perfect for the dough to do its magic.
Total time
In total, you’re looking at roughly 1 hour and 20 minutes to make your homemade gluten free pizza dough. This time includes both preparation and rising. With minimal effort, you’ll have a wonderful dough, ready for your choice of toppings and a delicious bake!
Nutritional Information for Homemade Gluten Free Pizza Dough
Understanding the nutritional profile of homemade gluten free pizza dough adds an important layer to your culinary adventure. Not only does it taste delicious, but it also can fit nicely into your health-conscious lifestyle.
Calories
A single serving of this dough contains approximately 150 calories, making it a satisfying yet manageable choice for your meal.
Carbohydrates
With around 28 grams of carbohydrates per serving, this homemade gluten free pizza dough ensures you’re energized without feeling too heavy.
Protein
This dough provides about 4 grams of protein, which helps to keep your hunger at bay and can be especially valuable when enjoyed with your favorite toppings.
Fiber
Each serving offers about 2 grams of fiber, contributing to better digestion and making your pizza feel a bit more wholesome.
Next time you’re whipping up some delicious pizza, remember that this dough not only tastes great, but it’s also a smart, nutritious choice!
FAQs about Homemade Gluten Free Pizza Dough
Making your own homemade gluten free pizza dough opens up a world of culinary possibilities—there’s nothing quite like drooling over a fresh, crispy pizza right from your kitchen. If you’re just getting started or you have questions, I’ve got you covered with some common FAQs.
Can I make this dough ahead of time?
Absolutely! You can prepare your homemade gluten free pizza dough in advance, which is a great time-saver. Once you’ve mixed and kneaded the dough, simply wrap it tightly in plastic wrap and refrigerate for up to 2 days. When you’re ready to use it, let it come to room temperature before rolling it out. You can also freeze it for up to a month—just remember to thaw it in the fridge overnight before you want to use it.
What toppings work best with gluten-free pizza?
The beauty of pizza is its versatility! For your homemade gluten free pizza dough, consider using fresh, colorful toppings. Some favorites include:
- Classic Tomato Sauce: A must for that traditional pizza vibe.
- Mozzarella Cheese: Melty and gooey, it pairs well with almost anything.
- Fresh Veggies: Bell peppers, onions, and mushrooms add crunch and flavor.
- Meat Options: Pepperoni, cooked sausage, or grilled chicken offer a hearty twist.
- Herbs: Fresh basil or oregano sprinkled after baking gives a lovely aromatic finish.
How can I store leftover dough?
If you find yourself with leftover homemade gluten free pizza dough, storing it is simple. Wrap it in plastic wrap or place it in an airtight container. The refrigerator keeps it fresh for about 2 days, while freezing will extend its shelf life up to a month. Just remember to thaw it in the fridge overnight when you’re ready to whip up another delicious pizza!
Conclusion on Homemade Gluten Free Pizza Dough
Creating your own homemade gluten free pizza dough transforms a regular dinner into an exciting culinary adventure. You might be pleasantly surprised by how easy and rewarding it is to whip up this dough in your own kitchen. Not only can you control the ingredients, ensuring nothing unwanted sneaks in, but you also get to customize it exactly how you like. Whether you’re piling it high with fresh veggies or indulging with your favorite cheese, the possibilities are endless. Embrace this simple recipe and enjoy the satisfaction of making gluten-free pizza from scratch that your friends and family will adore.
Print
Gluten-Free Pizza Crust
- Total Time: 1 hour 35 minutes
- Yield: 2 pizza crusts 1x
- Diet: Gluten Free
Description
A delicious gluten-free pizza crust recipe that is easy to make and perfect for any toppings.
Ingredients
Scale
- 1 ¾ cup lukewarm water (420ml)
- 4 tbsp whole psyllium husk (20g)
- 2 ½ cup + 1 tbsp gluten free all purpose flour blend (360g)
- 2 ¼ tsp quick yeast (8g)
- 2 tsp salt
- 1 tbsp sugar
- 2 tsp apple cider vinegar
- 1 tbsp olive oil + more for the crust
Instructions
- Psyllium Gel: Mix water and psyllium husk together in a medium bowl. Set aside to thicken up as you prep the other ingredients.
- Flour Mixture: Whisk flour, yeast, salt and sugar together in a large bowl until well combined.
- Combine ingredients: Stir the apple cider vinegar and oil into the psyllium gel then add the wet ingredients to the dry ingredients. Mix together until fully combined. Make sure to scrape down the bottom and sides of the bowl every so often to get all the floury bits. Mix together until you end up with a thick, smooth, slightly sticky dough that easily clumps together.
- Knead & Divide: Lightly flour your hands and a clean work surface. Place dough on the floured surface and knead until soft and smooth. Divide into two equal sized dough balls. Set one ball aside and cover with a tea towel to keep from drying out while you work with the other.
- Shape: Add a bit more flour to your work surface. Starting with the first dough ball: press down on the dough with your hands to flatten into a disc. Gently pull and gradually stretch the dough out in a circular shape. Make sure to lift and turn the dough every so often to keep it from sticking to the worktop. Continue pressing and stretching the dough (starting from the center and moving out) until your end up with a 10-12 inch circle. Once big enough, carefully lift and transfer to a large, un-rimmed baking sheet or pizza screen (recommended). Stretch & flatten the dough out after transferring if needed to get it back in shape.
- Proof: Brush a bit of olive oil over the top of the crust, then cover with plastic wrap or a kitchen towel in a warm, draft free environment to let the dough rise – at least 1 hour. (See notes for overnight proof)
- Add Toppings & Bake: Preheat oven to 475°F (250°C) – heat for at least 15 minutes before adding pizzas to ensure it’s fully heated. Add your preferred pizza toppings. Place in the middle of the oven and bake for 12-15 minutes until the crust is a lightly golden brown. Remove from oven, slice & serve.
Notes
- Overnight proofing can enhance flavor and texture.
- Prep Time: 20 minutes
- Cook Time: 15 minutes
- Category: Dinner
- Method: Baking
- Cuisine: Italian
Nutrition
- Serving Size: 1 slice
- Calories: 150
- Sugar: 0g
- Sodium: 300mg
- Fat: 5g
- Saturated Fat: 1g
- Unsaturated Fat: 3g
- Trans Fat: 0g
- Carbohydrates: 24g
- Fiber: 3g
- Protein: 4g
- Cholesterol: 0mg