Follow Me On Social Media!
Christmas Pavlova: The Best Festive Treat to Wow Your Guests
Introduction to Christmas Pavlova
When it comes to festive desserts, nothing quite captures the spirit of the season like a Christmas Pavlova. This luscious meringue-based delight is not just a treat; it’s a centerpiece that embodies the magic of holiday gatherings. Picture a delicate, crispy crust that gives way to a marshmallow-like center, all blanketed with a symphony of whipped cream and vibrant, colorful fruits. The moment you slice into it, you’re met with a wonderful combination of textures and flavors that evokes the joy of Christmas.
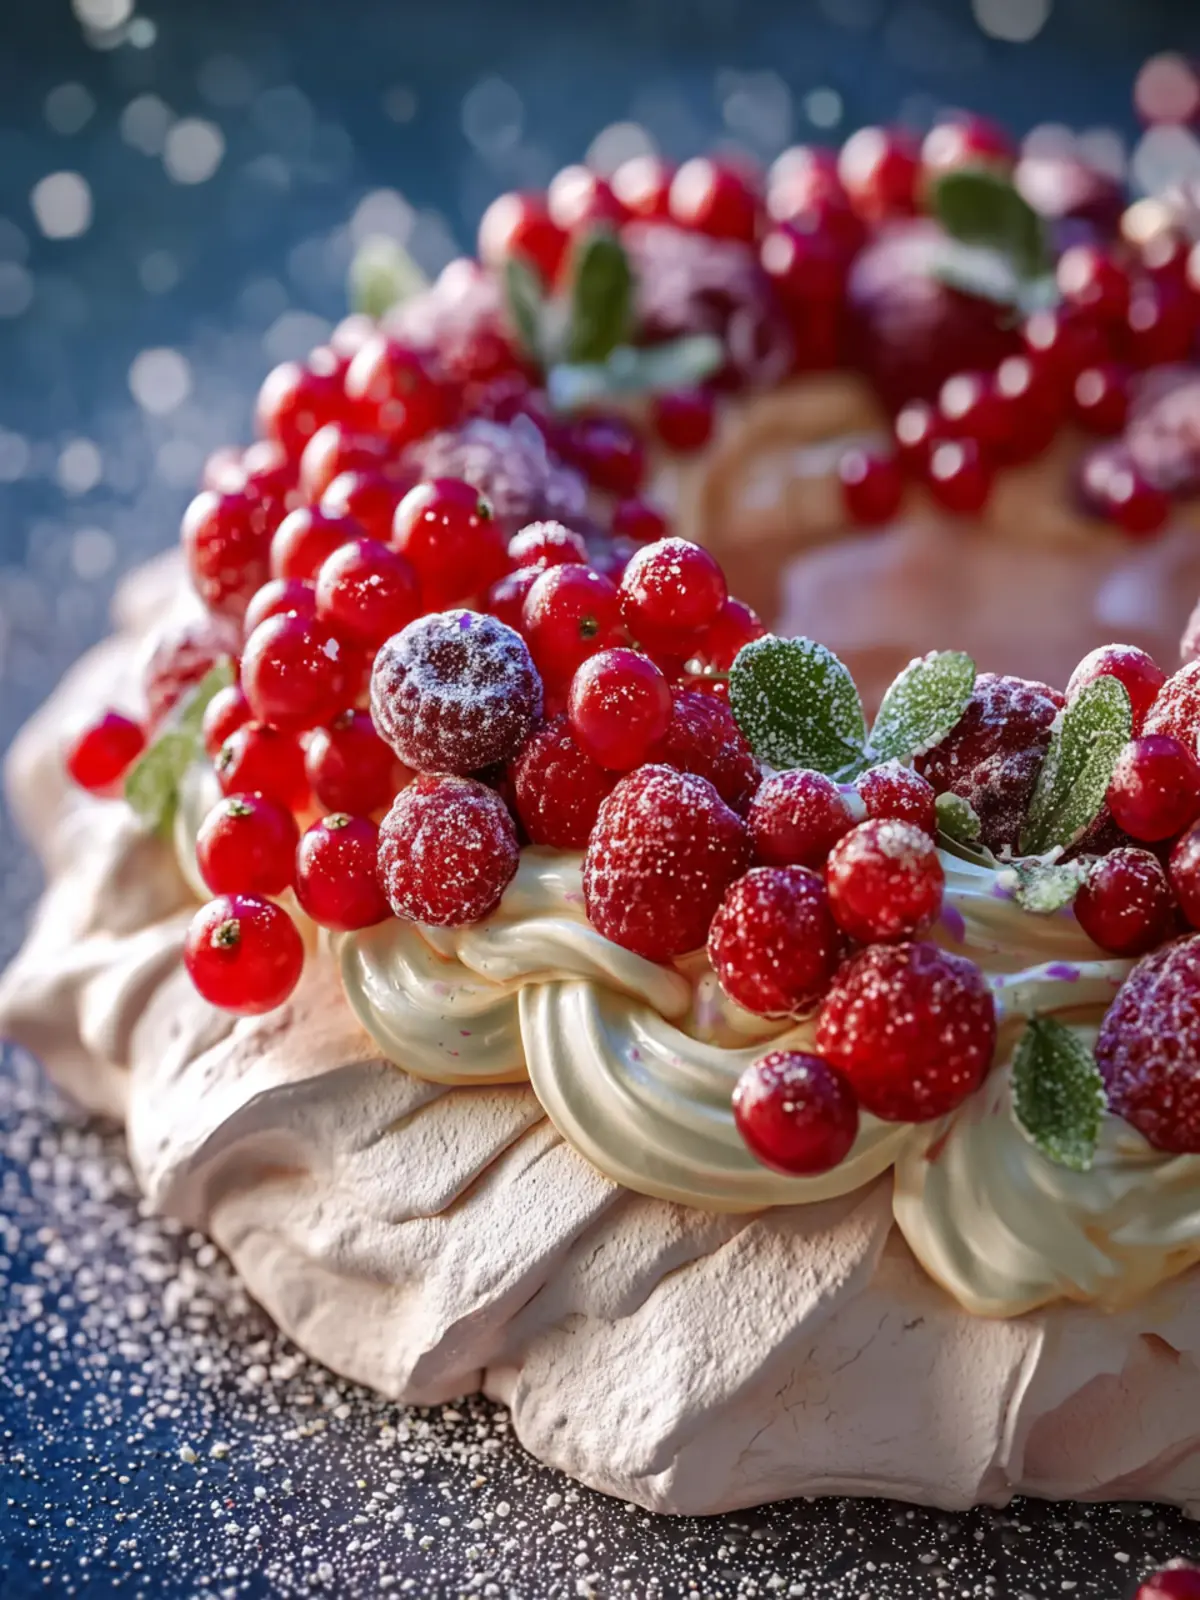
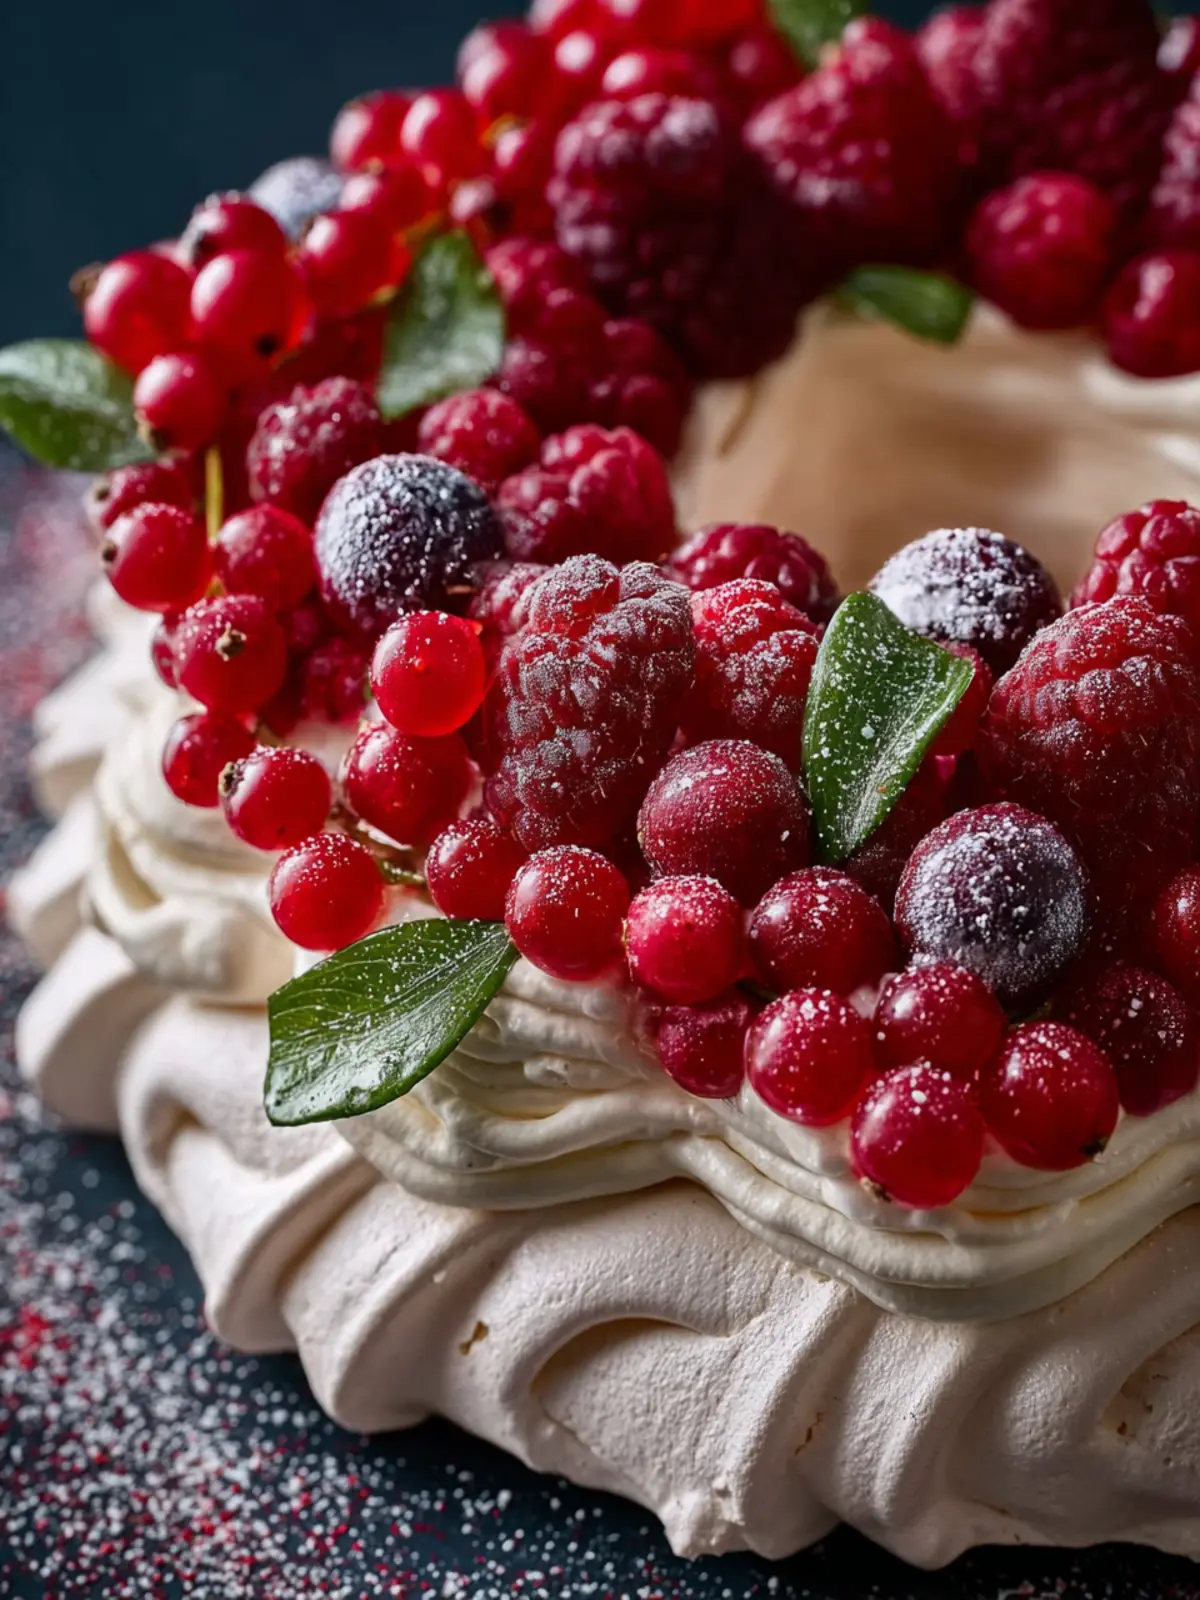
So what makes a Christmas Pavlova a holiday favorite? For many, it’s a cherished tradition passed down through generations. The visual appeal of this dessert, adorned with festive toppings like pomegranate seeds, kiwi, and fresh berries, adds a bright touch to any table. In fact, its light and airy texture is the perfect counter to the heavier meals often served during this time of year. Each bite feels indulgent yet refreshing, leaving guests satisfied without the sensation of being overly full.
Not to mention, the Christmas Pavlova is incredibly versatile. Want to cater to dietary restrictions? This gluten-free dessert is a welcome addition for guests who might shy away from traditional holiday cakes. And for those who love a good challenge in the kitchen, mastering the art of meringue can be a rewarding experience. There’s nothing like the thrill of watching those egg whites transform into stiff, glossy peaks, knowing that you’re creating something special for your friends and family.
Break away from the usual dessert suspects this holiday season and try making a Christmas Pavlova. Whether you’re hosting a grand celebration or a cozy gathering, this dessert is sure to bring a smile to everyone’s face. After all, what better way to celebrate the season of giving than by sharing a dessert that’s as beautiful to look at as it is to eat?
Key Ingredients for Christmas Pavlova
Creating a perfect Christmas Pavlova is all about selecting the right ingredients that work harmoniously together. Each component plays a vital role in crafting this delightful dessert, and here’s how to make sure you shine in your holiday baking.
-
Egg Whites: High-quality, fresh egg whites are essential for achieving that coveted crisp meringue exterior and marshmallow-like interior. They whip up nicely when at room temperature, so take them out of the fridge ahead of time.
-
Caster Sugar: This finely granulated sugar dissolves quickly and easily into the egg whites, allowing for a smooth meringue. As much as we love regular sugar, caster sugar is key to achieving the right sweetness and texture in your Christmas Pavlova.
-
Cornflour: Also known as cornstarch, this ingredient helps create the pavlova’s chewy center. Just a tablespoon added to your meringue makes a world of difference, providing that irresistible contrast to the crispy outer layer.
-
Vinegar: A dash of white vinegar or lemon juice adds stability to the egg whites as they whip. This is a baking secret that ensures your meringue holds its shape beautifully.
-
Toppings: The joyful part! Seasonal fruits like passionfruit, strawberries, and kiwis not only look festive but also add a refreshing tangy flavor that balances the sweetness of the pavlova. Whipped cream enhances the texture and makes every bite divine.
With these key ingredients, you’ll be well on your way to impressing your friends and family with a stunning Christmas Pavlova that will steal the show at any holiday gathering.
Why You’ll Love This Recipe
Crafting a perfect Christmas Pavlova isn’t just about preparing a dessert; it’s about creating a cherished centerpiece for your holiday gatherings. Imagine guests arriving, their eyes lighting up as they see your beautifully crafted pavlova, crowned with luscious whipped cream and a colorful assortment of seasonal fruits.
One of the greatest joys of this recipe is its simplicity. The ingredients are delightful yet minimal, making it easy for even novice bakers to create a showstopping dessert. You can have fun experimenting with toppings, whether it’s tart pomegranates, sweet strawberries, or tangy passion fruit, allowing you to customize it to your taste or what’s in season.
The texture is another highlight—each slice reveals a crisp outer shell that gives way to a soft, marshmallow-like interior. This contrast in textures paired with the creamy topping creates a symphony of flavors and sensations that will have everyone coming back for seconds.
Beyond its taste and appearance, the Christmas Pavlova is naturally gluten-free, making it a wonderful option for inclusive holiday desserts. It’s light enough to enjoy after a hearty holiday meal, leaving you satisfied without feeling weighed down. A perfect blend of festive cheer and culinary magic awaits—get ready to fall in love with this crowd-pleaser!

Tips for Making the Perfect Christmas Pavlova
Creating a stunning Christmas Pavlova starts with a few essential tips to ensure your dessert is light, airy, and utterly delightful.
Master the Meringue
Achieving the perfect meringue is crucial. Ensure your mixing bowl and beaters are completely grease-free. Any fat residue can hinder the egg whites from whipping up properly. Use room-temperature egg whites, as they whip more easily, yielding a sturdier structure.
Low and Slow Baking
Baking your pavlova at a low temperature is vital for that perfect, marshmallow-like texture in the center. A temperature of around 250°F (120°C) allows for slow drying without browning. Avoid opening the oven door during baking to maintain a consistent heat.
Choose Seasonal Toppings Wisely
For that festive flair, top your Christmas Pavlova with seasonal favorites. Fresh berries, pomegranate seeds, and whipped cream not only taste divine together but also enhance the visual appeal. Don’t be afraid to get creative—consider using citrus for a refreshing zing!
Let it Cool
Patience is key when it comes to cooling your pavlova. After baking, turn off the oven and let it cool completely inside. This prevents cracking and helps maintain its shape.
By following these tips, you’re on your way to impressing your guests with a show-stopping Christmas Pavlova that screams holiday cheer!
Time Breakdown for Christmas Pavlova
Creating a delightful Christmas Pavlova is both an art and a joy, and understanding the time commitment helps ensure a stress-free experience.
Preparation Time
To start, allow yourself about 20–25 minutes of preparation time. This is when you’ll gather your ingredients, whip up the egg whites to cloud-like peaks, and shape the pavlova base.
Baking Time
The magic happens in the oven, where your Christmas Pavlova will bake for roughly 1 hour. This slow-baking process ensures a crisp shell with a soft, marshmallow-like interior.
Cooling Time
Once out of the oven, the cooling period is crucial, taking about 1 hour. This allows the pavlova to set perfectly, ready for topping with your favorite festive fruits and cream.
By managing your time well, you’ll produce a stunning and delicious centerpiece that embodies the spirit of the season.
Nutritional Facts for Christmas Pavlova
The Christmas Pavlova is not only a delightful addition to your festive table but also offers a unique flavor profile that’s surprisingly light. Understanding its nutritional value can enhance your holiday experience.
Calories
A typical serving of Christmas Pavlova contains approximately 120 calories. This makes it a guilt-free dessert option that won’t derail your holiday indulgence plans.
Carbohydrates
Each serving has around 25 grams of carbohydrates. This is largely due to the sugar used, which contributes to the pavlova’s sweet and airy nature.
Sugars
You’ll find roughly 20 grams of sugar in each serving. Opting for fresh fruits as toppings can add natural sweetness while also providing extra nutrients to balance it out.
Enjoying a festive dessert doesn’t always mean sacrificing your health; Christmas Pavlova deftly balances both indulgence and nutrition.
FAQs about Christmas Pavlova
Making a Christmas Pavlova can be an exciting, albeit a nerve-wracking experience, especially if it’s your first time. It’s a beautiful dessert that definitely steals the spotlight on any festive table. To help ease any concerns you might have, here are some frequently asked questions about crafting the perfect Pavlova.
What should I do if my meringue doesn’t whip up?
If you’re struggling to whip your meringue, don’t panic. First, ensure your mixing bowl and beaters are impeccably clean and free from grease. Even a tiny amount can prevent the egg whites from reaching their full volume. If you’re using fresh eggs, make sure they’re at room temperature, as they whip better when warmed slightly. If you’ve tried everything and it still doesn’t whip, consider starting with new egg whites, as old eggs tend to be less effective.
How can I prevent the pavlova from cracking?
To minimize Christmas Pavlova cracking, it’s essential to bake it at a low temperature. A slow, gentle bake encourages a lovely crust while keeping the inside soft and marshmallow-like. Don’t open the oven door during baking; sudden temperature changes can lead to cracks. Once baked, turn off the oven and leave the Pavlova inside to cool slowly, allowing it to set and finish cooking.
Can I make the pavlova ahead of time?
Absolutely! Making your Christmas Pavlova a day in advance is a great strategy. Once it cools completely, store it in an airtight container at room temperature, away from moisture, which can wreak havoc on that crispy shell. When you’re ready to serve, add your toppings just before your guests arrive for the best presentation and freshness.
This way, you can enjoy a stress-free holiday, knowing that your effort in making this classic dessert will shine!
Conclusion on Christmas Pavlova
In the culmination of your Christmas Pavlova adventure, you’re not just indulging in a dessert; you’re creating a centerpiece that captures the joy of the season. This delightful meringue is light and airy, topped with a medley of fresh fruits that evoke the festive spirit. Each bite offers a burst of flavor, leaving your guests asking for more.
Sharing this Christmas Pavlova at gatherings is bound to wrap everyone in a cozy holiday embrace. So, as you whip up this treat, remember: it’s not just about the ingredients but the love and joy you pour into it that makes it truly special. Happy baking!
Print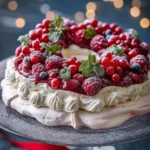
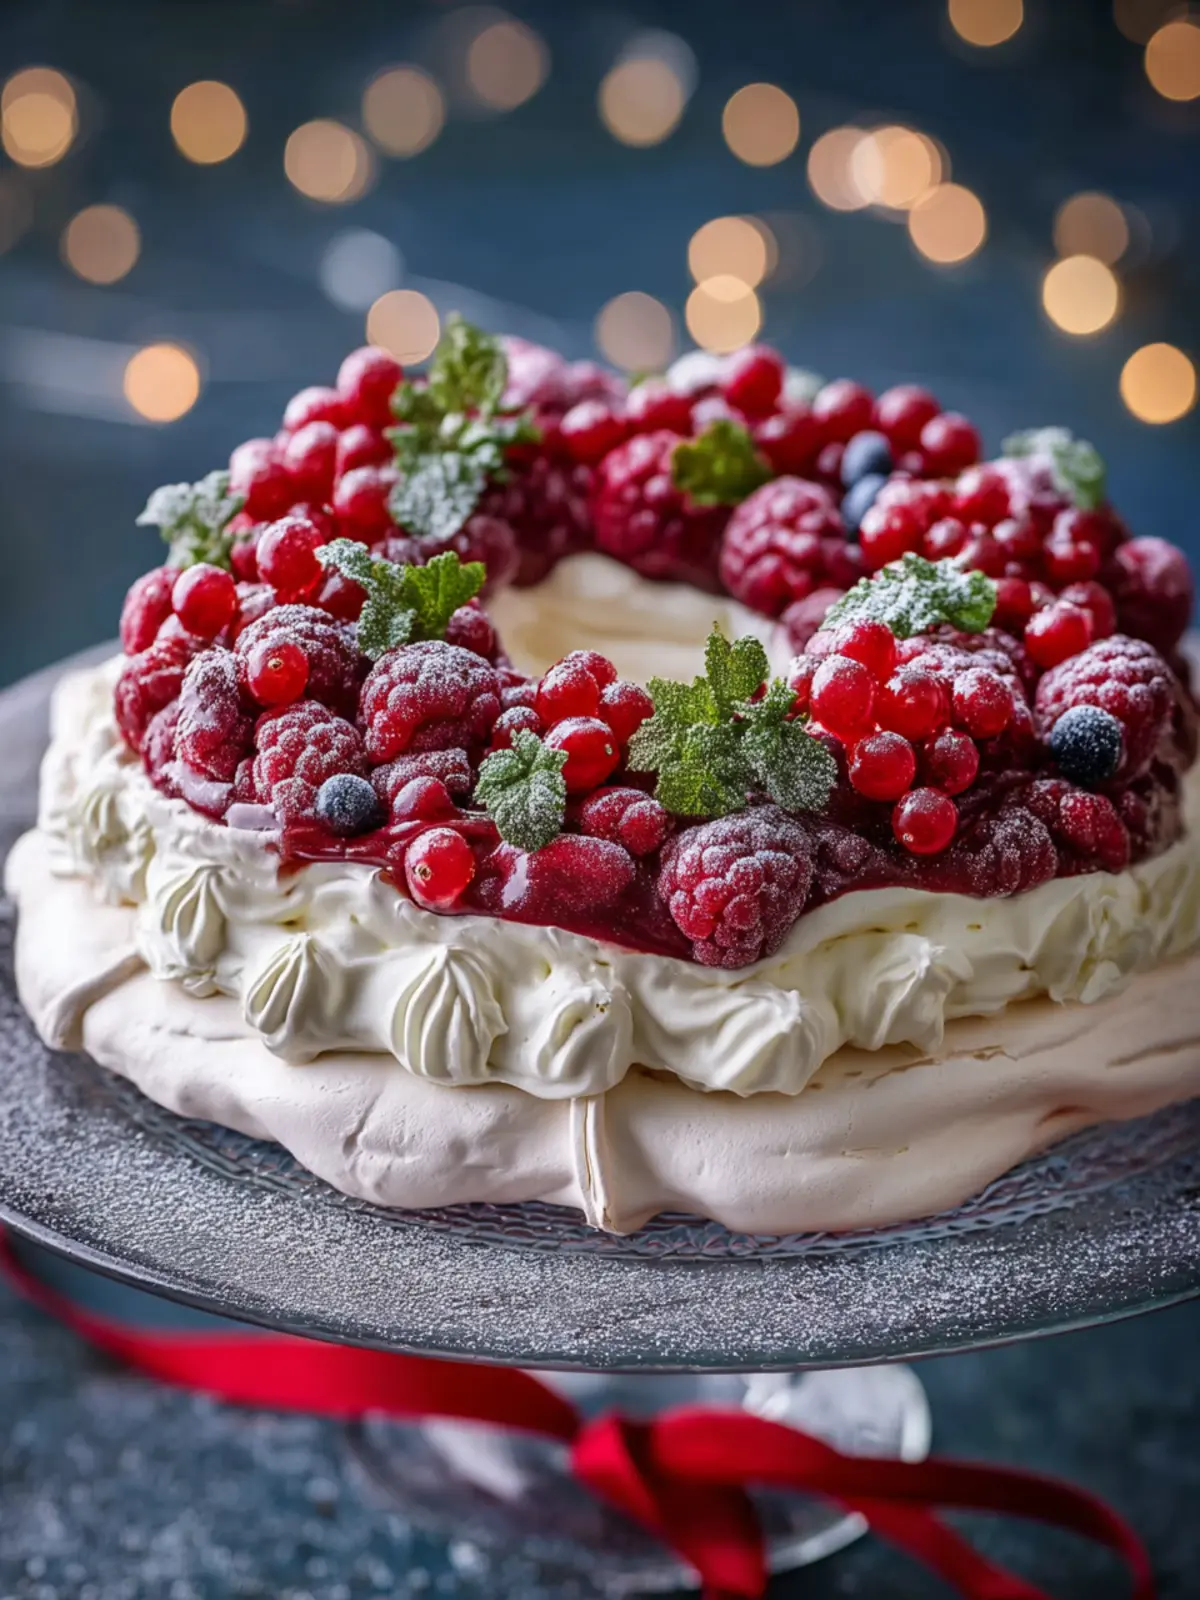
Pavlova with Raspberries and Cream
- Total Time: 2 hours 30 minutes
- Yield: 8 servings 1x
- Diet: Vegetarian
Description
This pavlova is a light and airy dessert topped with fresh raspberries and a delicious whipped cream mixture.
Ingredients
Scale
- 6 large egg whites
- 1 1/2 cups granulated sugar (super fine sugar, if possible)
- 2 tablespoons cornstarch
- 1 pinch salt
- 1 cup heavy cream
- 8 ounces mascarpone cheese (or cream cheese)
- 1 1/4 cups powdered sugar
- 1 teaspoon vanilla bean paste or extract
- 12 ounces fresh raspberries
- Fresh mint leaves
- Powdered sugar for dusting
Instructions
- Preheat oven to 310 degrees. Start by ensuring your bowl is clean of any water or grease. Separate your egg whites from your egg yolks and ensure there are no egg yolks in the bowl with the whites. Room temperature egg whites work best.
- Whip the egg whites on high speed until soft peaks form. Begin adding the sugar a little at a time, whipping the mixture continuously. After all of the sugar has been added, beat for 3 minutes longer, until thick and glossy.
- Add in cornstarch and a pinch of salt and whip just until combined, about 5 seconds.
- Tear a sheet of parchment paper large enough to cover your baking sheet. Place an 8–10 inch bowl or cake pan upside down on the parchment. Trace a circle lightly with pencil. Draw a smaller circle inside (about 4–5 inches wide) to create the ring shape. Flip the parchment over so the pencil marks are underneath but still visible through the paper.
- Add large dollops of meringue around the outer circle first. Work your way around in a ring, ensuring the meringue touches between dollops for stability.
- For a dramatic, cloud-like wreath, add another layer of meringue on top. Gently swirl or lift the meringue with the back of a spoon or spatula.
- Place in oven and immediately reduce heat to 250 degrees. Bake for 1 hour 10 minutes. Do not open the oven during this time.
- Once the baking time is up, turn off the oven and let the pavlova remain in the oven for 2 hours.
- Gently remove from oven when done.
- In a large bowl, whip the heavy cream, mascarpone cheese, and powdered sugar until soft peaks form. Fold in vanilla bean paste.
- Spread the whipped cream mixture over the pavlova. Top with fresh raspberries and dust with powdered sugar.
- Serve immediately and enjoy!
Notes
- This dessert is best eaten soon after preparation for optimal texture.
- Keep the pavlova stored in a cool, dry place.
- Prep Time: 20 minutes
- Cook Time: 70 minutes
- Category: Desserts
- Method: Baking
- Cuisine: Australian
Nutrition
- Serving Size: 1 slice
- Calories: 250
- Sugar: 35g
- Sodium: 55mg
- Fat: 10g
- Saturated Fat: 5g
- Unsaturated Fat: 3g
- Trans Fat: 0g
- Carbohydrates: 38g
- Fiber: 1g
- Protein: 3g
- Cholesterol: 25mg